Configure CI runners for GitHub Actions
This page walks you through the configuration steps required to start using EngFlow CI runners with your GitHub Actions implementation.
Process overview
At a high-level, you'll need to complete the following steps to run your Bazel builds using EngFlow CI runners:
- Create and register a GitHub app
- Contact EngFlow to enable CI runners in your cluster
- Add a webhook in GitHub
- Build a CI container
- Define a Bento
- Update the labels in your workflow file to reference your Bento
Step 0: decide where to register runners
There are two choices:
- Organization-level: the runners can accept any job with label
self-hostedin the organization. Requires Self-hosted runners: Read, Write permission at the organization level. - Repository-level: the runners are created specifically for repos that have jobs outstanding. Requires Administration: Write permission at the repository level.
The credential for organization-level runners is more secure because
organization: self-hosted runners: write is less powerful than
repository: administration: write. However, it causes EngFlow to
pick up any job that is marked self-hosted across the entire
organization. This may be incompatible with
availability/security/performance requirements for specific
repositories within the organization. This can be mitigated by adding
labels to runners beyond self-hosted, so EngFlow doesn't pick up the
job.
Decentralized organizations (many repositories, no centralized control over CI configurations) should use repo-level registration. Centralized organizations (monorepo, tight control over CI configuration) should use organization-level registration.
Communicate this choice to EngFlow.
Step 1: Create and register a GitHub app
Organization owner or admin role required
To configure CI runners for GitHub Actions, you'll need to be an organization admin or organization owner.
-
Create a GitHub app with the following permissions:
- Organization-level permissions (if using organization-level registration)
- Self-hosted runners: Read, write
- Repository-level permissions:
- Administration: Write (if using repository-level registration)
- Actions: Read, write
- Metadata: Read
Why are these permissions needed?
Organization-level permissions:
- Self-hosted runners: Read - Required to retrieve information about available GitHub Actions runner binaries, including different versions, operating systems (Linux, macOS, Windows), and architectures (x64, ARM64). EngFlow uses this to download the correct runner binary.
- Self-hosted runners: Write - Required to generate JIT (Just-In-Time) runner registration tokens at the organization level. EngFlow uses these tokens to dynamically create runners for organization-wide workflows.
Repository-level permissions:
- Administration: Write - Required to generate JIT (Just-In-Time) runner registration tokens at the repository level. EngFlow uses these tokens to dynamically create runners for repository-specific workflows.
- Actions: Read - Required to query workflow runs, jobs, and their statuses. EngFlow uses this to monitor CI workflow progress and results.
- Actions: Write - Optional but recommended. Allows EngFlow to trigger re-runs of failed workflow jobs. Particularly useful during trial periods and for improved supportability.
- Metadata: Read - Required to download repository archives. EngFlow uses this to access repository content when needed.
Make a note of the app ID.
- Organization-level permissions (if using organization-level registration)
-
Create a private key for the GitHub app.
- Convert the private key from the standard PEM format into the PKCS#8 format using the following command:
Bash -
Create a .json file containing both the app ID and the private key, using the format:
JSON Generate the
.jsonfile programmaticallyIf you have the
moreutilspackage installed, you can run the following command to generate the.jsonfile:Bash -
Register the app in your organization
- Upload the
.jsonfile to the secrets manager running in your EngFlow cluster. Note the address of the secret.
Step 2: Contact EngFlow to enable CI runners in your cluster
Next, contact EngFlow support to enable the CI runners feature in your cluster. You'll receive confirmation once we've completed your request. Make sure to provide the address of the secrets stored in your cluster's secrets manager.
To verify that your cluster is set up to use CI runners:
- Log in to your EngFlow cluster's Build and Test UI.
- Confirm that the Bento button is displayed in the left sidebar.

You're now ready to continue setting up CI runners.
Step 3: Add a webhook in GitHub
Prerequisite: Payload URL
Before you begin, make sure your EngFlow contact has provided you with the confidential UUID that's part of the payload URL required to add the webhook.
To add the webhook:
-
From your repository's GitHub page, go to Settings Webhooks Add webhook.
Repository-level vs. organization-level webhooks
We recommend configuring webhooks for each repository that sends CI jobs to the cluster. This way GitHub only sends notifications for repositories the cluster cares about.
Alternatively you could configure an organization-level webhook. GitHub then sends a webhook request for every CI job in every repository. This can put unnecessary load on the cluster, which must process every request, even for repositories it isn't configured to pick up jobs from. We only recommend an organization-level webhook if most repositories send CI jobs to the cluster.
-
In the Add webhook dialog, fill out the fields with the following information:
- Payload URL:
https://<name>.cluster.engflow.com/webhooks/github/runners/<uuid>(UUID value is provided by EngFlow). - Content type:
application/json - Secret: none (we use a secret embedded in the webhook URL)
- SSL verification:
Enable SSL verification - Select Let me select individual events and make sure that the only selected event type is Workflow Jobs.
- Payload URL:
Step 4: Build a CI container
The CI agent runs inside a container on your EngFlow cluster, just like regular Remote Execution actions. The CI agent executes the workflow (as defined in a YAML file) in this container.
Since the workflow steps typically include running commands like git clone and bazel test //..., the container running the job must have all the tools installed that are needed on the CI host, such as ca-certificates, git, bazel, local toolchains, etc. The CI agent itself does NOT have to be installed; our system injects the latest agent into the container. Create and host this CI container in a hosting location that EngFlow workers can successfully pull from. See Storing your image for recommendations.
Create and assign engflow as the default user in the Dockerfile
As shown in the sample Dockerfile below, you must create an engflow user, then add the USER engflow instruction to ensure that engflow is set as the default user.
Otherwise, you'll see the following error when the container is run:
Here's an example Dockerfile for such a CI container:
Step 5: Define a Bento
Build and Test UI access permissions
If your cluster uses the --http_auth=none option, then you cannot perform the following steps in the Build and Test UI. Contact EngFlow to help you with defining Bentos.
You can create, list, update, and delete Bentos from your EngFlow cluster's Build and Test UI.
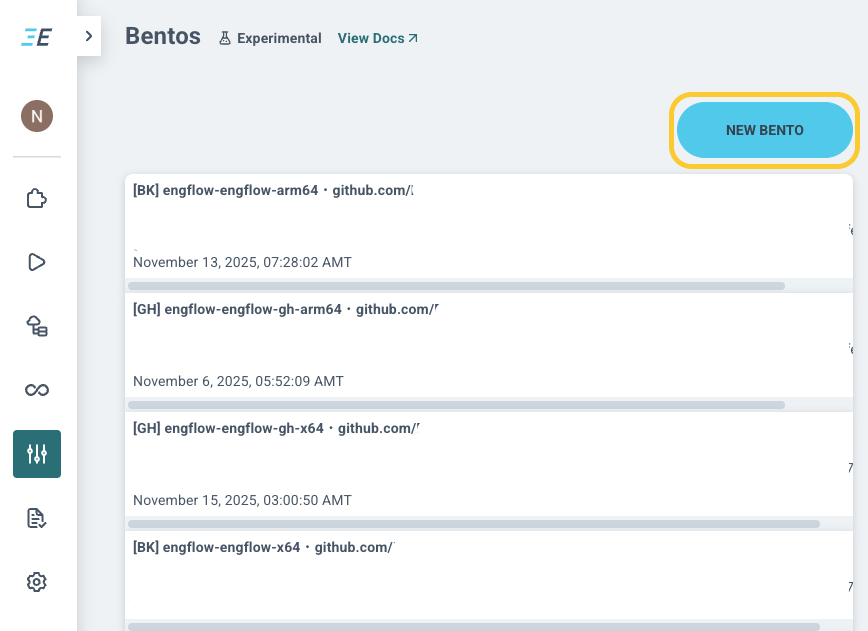
To create a new Bento:
- Navigate to the Bentos list view from the sidebar in your EngFlow cluster's Build and Test UI.
-
Click New Bento.
-
In the Create Bento dialog, fill out all required fields. See configure bento for background.
Step 6: Update the labels in your workflow file
Once you define the Bentos for your project, update your GitHub workflow file(s) to reference them. These labels ensure that CI jobs are assigned to EngFlow workers running warm Bazel.
Here's an excerpt from a sample workflow.yml file for a job that
creates snapshots (typically generated by running a command like
bazel build //...):
Snapshots are taken from jobs with engflow-bento-allow-save=true,
with one of the following event types:
push(direct push, or merge PR)workflow_dispatch(manual trigger)schedule(cron schedule)
If your build doesn't generate these (e.g. you're using merge queues), add a cron schedule so there are regular builds eligible for snapshotting. We recommend once every 6 hours.
If you want to run other jobs starting from the snapshot (for example,
a linting job that just does bazel run //linter:my-lint), then those
jobs need fewer labels. Here is an excerpt:
| workflow.yml | |
|---|---|
Step 7: Update settings for public repositories
As a security measure, GitHub stops workflows from public repositories from running on self-hosted runners. Please see GitHub docs for advice on self-hosted runners and public repositories.