Configure CI runners for Buildkite
This page walks you through the configuration steps required to start using EngFlow CI runners with your Buildkite CI implementation.
Process overview
At a high-level, you'll need to complete the following steps to run your Bazel builds using EngFlow CI runners:
- Create secrets
- Contact EngFlow to enable CI runners in your cluster
- Build a CI container
- Define a Bento
- Update the labels in your Buildkite workflow to reference your Bento
Step 1: Create secrets
Your EngFlow cluster requires secrets to acquire jobs from and register runners with Buildkite. Depending on how your cluster is hosted, you have to manually create these secrets either in the AWS Secrets Manager or the Google Cloud Secret Manager. Note the address of the secrets in the secrets manager - EngFlow needs this information to enable CI runners in your cluster.
EngFlow CI runners configuration needs two required secrets and one optional secret:
- [Required] An API token with read-only scope used by the EngFlow cluster to query Buildkite for jobs.
- [Optional] The same type of API token as above but with read and write scopes used by the EngFlow cluster to update builds with annotations such as the invocation link for a specific job.
- [Required] A collection of JSON key-value pairs that are environment variables used by the Buildkite agent to authenticate to the Buildkite server.
The following sections describe these secrets in detail.
Required secret: Read-only API token
This is a Buildkite API token used by your EngFlow cluster to query Buildkite for jobs. This token is used to call the GET /v2/builds endpoint.
- Example token name:
myEFcluster-bk-read-token - Token format:
bkua_1234(...)cdef
Create the Buildkite API access token
To create this token in the Buildkite UI:
- In the global navigation, select your user profile icon and go to Personal Settings.
- Select API Access Tokens.
- Select New API Access Token.
- Create your token with the required
read_buildsscope.
For more information, see Buildkite's Access token API documentation.
Optional secret: API token with read and write scopes
Use one token with wider scope
If you choose to create an API token with both read and write scopes, you can define this token instead of the read-only API token.
This token is similar to the Read-only API token but has an additional write_builds scope. Your EngFlow cluster uses this token to update builds with annotations such as the invocation link for a specific job.
- Example token name:
myEFcluster-bk-readwrite-token - Token format:
bkua_1234(...)cdef
To create this token, follow the steps as outlined in Create the Buildkite API access token, but assign both read_builds and write_builds scopes.
For more information, see Buildkite's Access token API documentation.
Required secret: Environment variables
The Buildkite agent polls the Buildkite server for work and passes back output logs and build artifacts. The agent requires a set of environment variables to communicate with the Buildkite server. To enable this, your EngFlow cluster requires a JSON object containing these environment variables as key-value pairs.
The following code sample shows an example secret named mycluster-bk-secrets containing environment variables that the Buildkite agent can use.
| mycluster-bk-secrets | |
|---|---|
The following sections describe how to create each key-value pair.
Buildkite agent token
Your EngFlow cluster passes the token value as-is to the Buildkite agent, which authenticates with it to the Buildkite server.
Note that this token is (these tokens are) different from the read-only API token.
See Using and storing tokens for more information.
Set BUILDKITE_AGENT_TOKEN (singular) to a string containing the token:
"BUILDKITE_AGENT_TOKEN":"token".
You can either use the existing default token for your organization, or create a new token. See Unclustered tokens for more information.
Set BUILDKITE_AGENT_TOKENS (plural) to a JSON object of "Buildkite cluster ID : token"
pairs like so: "BUILDKITE_AGENT_TOKENS":{"cluster1":"token1","cluster2":"token2"}. See Do
you support Buildkite clusters below.
SSH private key
Set the value of the SSH_PRIVATE_KEY_RSA_B64 key to a base64-encoded SSH private key.
Note that the SSH key doesn't have to be an RSA-type key. In fact we encourage using a shorter key, such as Ed25519. The JSON object key contains the RSA string for historical reasons.
This SSH key authorizes EngFlow CI runners to clone the GitHub repository over SSH for the CI job. The key will be injected into the CI container as ~/.ssh/id_rsa. (Again, the name "rsa" plays no role here.)
To generate the JSON value:
- Start with the SSH key that originally looks like this:
- Encode the key with
base64 -w0. - Use the resulting value as the JSON value for the
SSH_PRIVATE_KEY_RSA_B64key.
Other environment variables
Any other keys in the mycluster-bk-secrets secret are passed as environment variables as-is. As best practice, use this file only to pass secrets, and keep the file size small (total size < ~8KB) because at one point this data is passed in an HTTP header.
To pass non-secret environment variables, see How do I pass secrets and environment variables to jobs.
Step 2: Contact EngFlow to enable CI runners in your cluster
Next, contact EngFlow support to enable the CI runners feature in your cluster. Make sure to provide the address of the secrets stored in your cluster's secrets manager.
You'll receive confirmation once we've completed your request.
To verify that your cluster is set up to use CI runners:
- Log in to your EngFlow cluster's Build and Test UI.
- Confirm that the Bento button is displayed in the left sidebar.

You're now ready to continue setting up CI runners.
Step 3: Build a CI container
The CI agent (Buildkite agent) runs inside a container on your EngFlow cluster, just like regular Remote Execution actions. The CI agent executes the workflow (as defined in a YAML file) in this container.
Since the workflow steps typically include running commands like git clone and bazel test //..., the container running the job must have all the tools installed that are needed on the CI host, such as ca-certificates, git, bazel, local toolchains, etc. The CI agent itself does NOT have to be installed; our system injects the latest agent into the container. Create and host this CI container in a hosting location that EngFlow workers can successfully pull from. See Storing your image for recommendations.
Create and assign engflow as the default user in the Dockerfile
As shown in the sample Dockerfile below, you must create an engflow user, then add the USER engflow instruction to ensure that engflow is set as the default user.
Otherwise, you'll see the following error when the container is run:
Here's an example Dockerfile for such a CI container:
Step 4: Define a Bento
Build and Test UI access permissions
If your cluster uses the --http_auth=none option, then you cannot perform the following steps in the Build and Test UI. Contact EngFlow to help you with defining Bentos.
You can create, list, update, and delete Bentos from your EngFlow cluster's Build and Test UI.
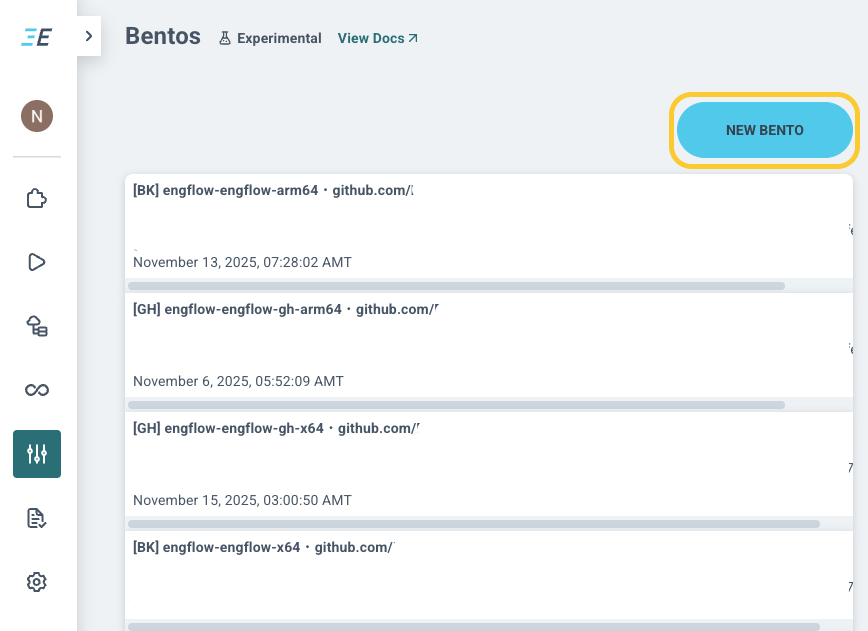
To create a new Bento:
- Navigate to the Bentos list view from the sidebar in your EngFlow cluster's Build and Test UI.
-
Click New Bento.
-
In the Create Bento dialog, fill out all required fields. See configure bento for background.
Step 5: Update the labels in your Buildkite workflow
Once you define the Bentos for your project, update your Buildkite pipelines to reference them. These labels ensure that CI jobs are assigned to EngFlow workers running warm Bazel.
Here's an excerpt from a sample pipeline.yml file showing required and optional labels:
Frequently Asked Questions
How do I specify the CPU architecture of jobs?
The worker pool associated with the Bento (see Define a Bento) encodes the CPU architecture. Currently it's also necessary to set the os= and arch= labels in the pipeline.yaml file. For more information, see Update the labels in your Buildkite workflow.
How do I pass secrets and environment variables to jobs?
It depends on the kind of value you want to pass.
If you need to pass a secret, add it to the secret JSON object containing environment variables. For more information, see Required secret: Environment variables.
If you need to pass a non-secret environment variable, add it as a job label in your pipeline.yml file: engflow-agent-env=ENV_NAME=value; You can specify this label multiple times in the file. For more information, see Update the labels in your Buildkite workflow.
How does the EngFlow cluster pick up Buildkite CI jobs?
The cluster responds to Buildkite webhooks, and additionally polls periodically for available jobs. The cluster transforms the job into a remote action, which is then scheduled on the cluster. Once the action runs, it starts the Buildkite Agent, which talks to Buildkite to acquire and execute the job. To Buildkite, it will look like a self-hosted, ephemeral runner.
How do I set up a Buildkite webhook?
Your EngFlow contact will provide you with a UUID for the Buildkite webhook.
To create your webhook, follow the instructions at Add a webhook (Buildkite). During setup, use the following information specific to your EngFlow CI runners:
- Webhook URL:
https://$CLUSTER.cluster.engflow.com/webhooks/buildkite/agents/$UUID - Set the
job.scheduledevent as the event that triggers the webhook.
Why does Buildkite say my job complete, but the EngFlow UI says it's executing?
This is probably because the job completed recently but there are post-run operations (e.g. snapshotting) still running in EngFlow. At this point the CI job itself is already complete and the Buildkite Agent already reported the completion to the Buildkite server.
Why does Buildkite say my job is pending, but the EngFlow UI says it failed?
This happens if there is an error with the job before the execution starts. Probable causes for this error are a bug in EngFlow, or container pull errors (e.g., the container URL is incorrect).
The precise reason can be inferred from the Stderr output of the EngFlow action associated with the job. To inspect the action result in your EngFlow Build and Test UI:
- Access the CI Runners Status page.
- Find the listing for the CI job, and select the corresponding View execution result link. This opens the Action Details page.
- On the Action Details page, expand the Action Result card.
- Inspect the
Stderroutput.
The cluster cannot cancel the job on the user's behalf, nor can it report failure to Buildkite, so the job appears to be queued.
My snapshot is bad. How do I stop using it?
There are two options:
- Option A: Using the New build dialog in the Buildkite UI, run a new job with the additional environment variables
ENGFLOW_BENTO_FORCE_COLD=1andENGFLOW_BENTO_FORCE_SAVE=1. Run it on thebranchspecified in the Bento definition (e.g.main). This forces a cold run (i.e., no existing snapshot is used) and creates a new snapshot. This option is slower than Option B, but has no race condition. -
Option B: Invalidate the snapshot by updating the Bento definition that it belongs to. Do the following steps:
- In the Bento definition, unselect the Allow snapshots option and save it.
- Edit the definition again to select the Allow snapshots option and save it.
Doing so effectively invalidates snapshots (see If I updated a Bento definition, will the existing snapshot be lost?). All runs will be cold until there is a new snapshot. To create a run, kick off a build on the
masterbranch (or whichever branch you configured in the bento) on Buildkite. This option is faster than Option A, but leaves a small window of transience when someone might pick up the Bento between the two edits.
Do you support custom Buildkite hooks?
Yes, add "engflow-agent-env=BUILDKITE_ADDITIONAL_HOOKS_PATHS=/my-hooks" to the agent description. The value /my-hooks should point to the directory where the custom hooks are stored inside the build image. This causes the $BUILDKITE_ADDITIONAL_HOOKS_PATHS environment variable to be passed to the agent.
How to set custom buildkite-agent options?
Use one of the following options:
- Inside the image defined in the Bento, put the custom configuration in
$HOME/.buildkite-agent/buildkite-agent.cfg. - Put the configuration somewhere else, and add
- “engflow-agent-env=BUILDKITE_AGENT_CONFIG=path/to/config”to the agent section in thepipeline.ymlfile. - Some options can be set directly through environment variables, which can be set using
engflow-agent-env=KEY=VAL.
Do you support Buildkite clusters?
Yes. See Buildkite agent token above.