Test Report
When running a test with Bazel, the target details shown on the Invocation Details page provide a test report.
Screenshot of a basic test report
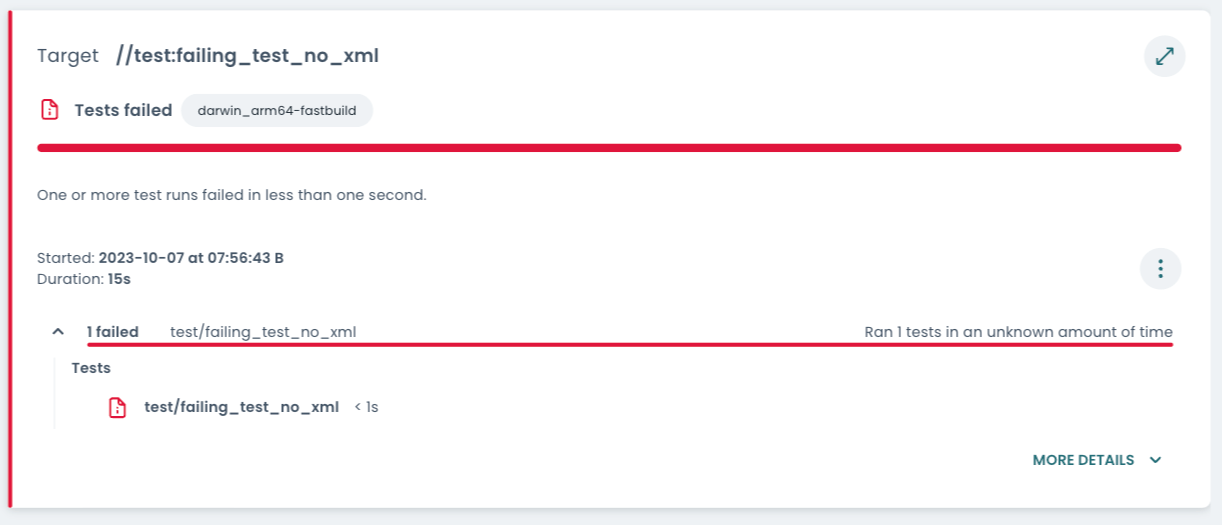
The test report starts with an overview, which includes the overall status and a bar indicating which status individual results have.
Thereafter—if the test has multiple shards, runs or attempts—selectors are shown to pick a specific result. See the section on Test sharding, runs per test and test attempts below.
Often there is just one shard, one run and one attempt and therefore the invocation includes just one result. Then none of the selectors are shown, as seen in the screenshot above.
Next the details on the selected result is shown. These include when the test
was run and how long it took to complete. The three-dot menu
towards the right gives access to its output files, such as related logs and
undeclared test outputs. Thereafter, the contents of the
test.xml are visually rendered.
Finally, build output files can be accessed by expanding MORE DETAILS.
Contents of the test.xml
When running a test with Bazel, an XML file with a summary is generated.
Test targets may output a custom XML file, see
XML_OUTPUT_FILE.
If no custom XML file is output, Bazel generates a default file that includes
the test log. However, test runners can provide more in-depth information on the
test actions executed, as can be seen in the screenshot below.
Screenshot of a target that output a custom test.xml
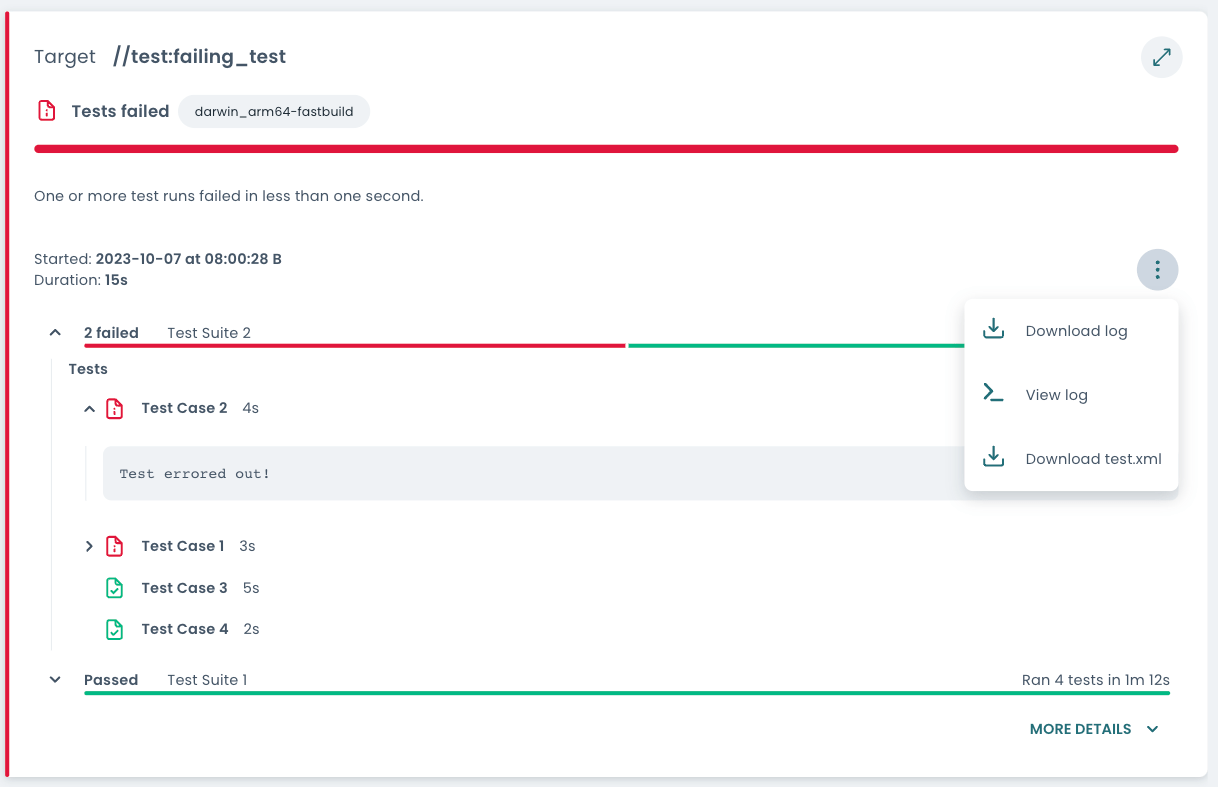
The XML file may expose the test suites that were run, as well as which test
cases each includes. Each test case listed in the test.xml indicates its
pass/fail status. It may provide further data, such as timing information or
failure messages. If reported, failure messages can be accessed by expanding the
test case’s details.
Note that in the Build and Test UI the test suites and test cases are sorted so
that failures appear first. The order in which they are listed in the test.xml
is not preserved.
Test sharding, runs per test and test attempts
There are multiple ways in which you can influence how and how often Bazel runs a test target.
Test sharding
Test sharding
can be enabled using the rule attribute shard_count. It parallelizes the
execution of multiple test cases included in the same target, provided
the test runner supports sharding. Roughly speaking, sharding splits one large
test target into multiple smaller (virtual) test targets.
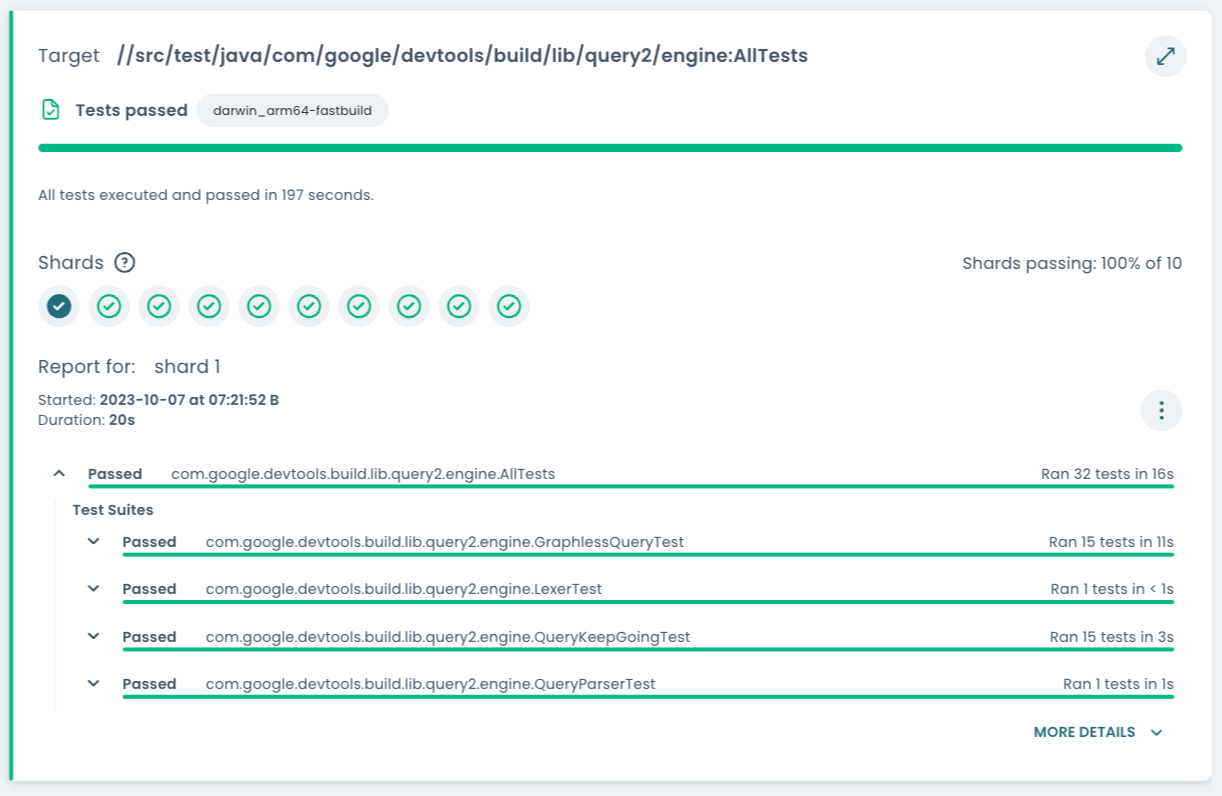
Screenshot with test sharding enabled
Runs per test
When specifying the Bazel flag --runs_per_test each test is run the specified number of times. If any of the runs fails, the test is considered failed or—when using the flag --runs_per_test_detects_flakes—flaky.
In contrast to test attempts, the test is run exactly the number of times configured, even if some runs succeed. This can be used to find and debug flaky tests.
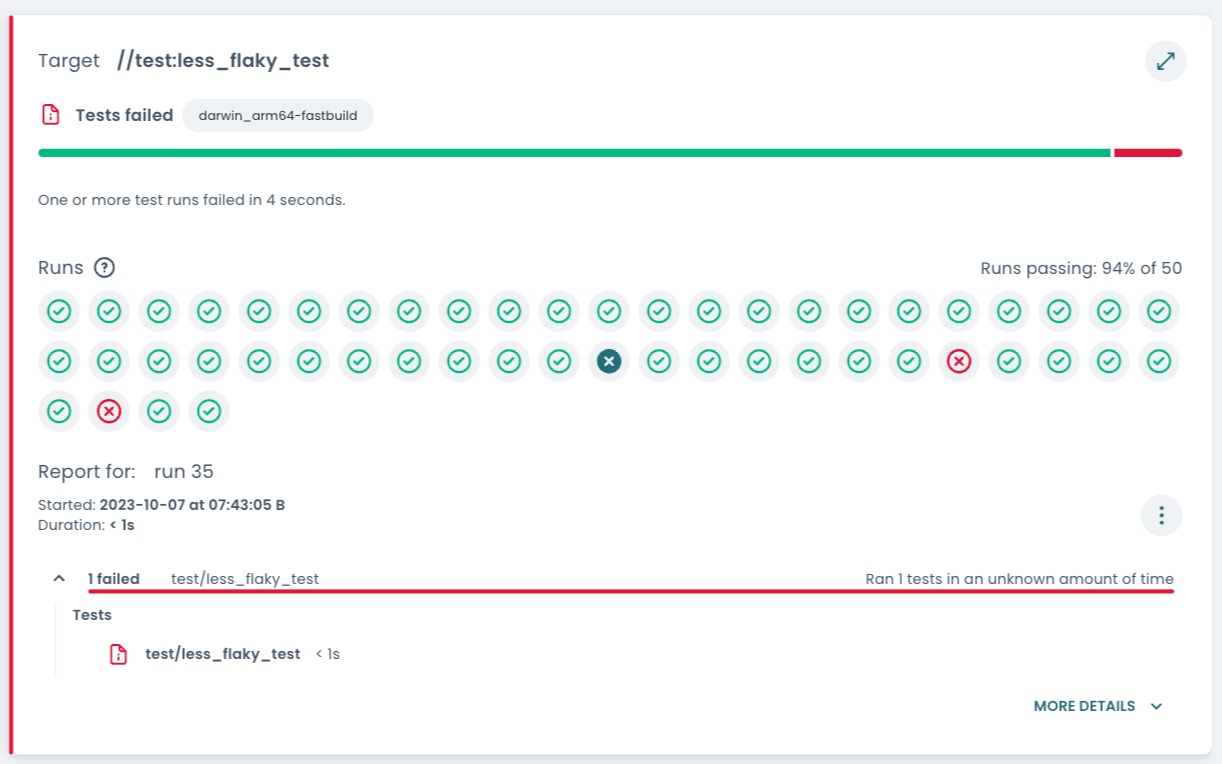
Screenshot with multiple runs per test
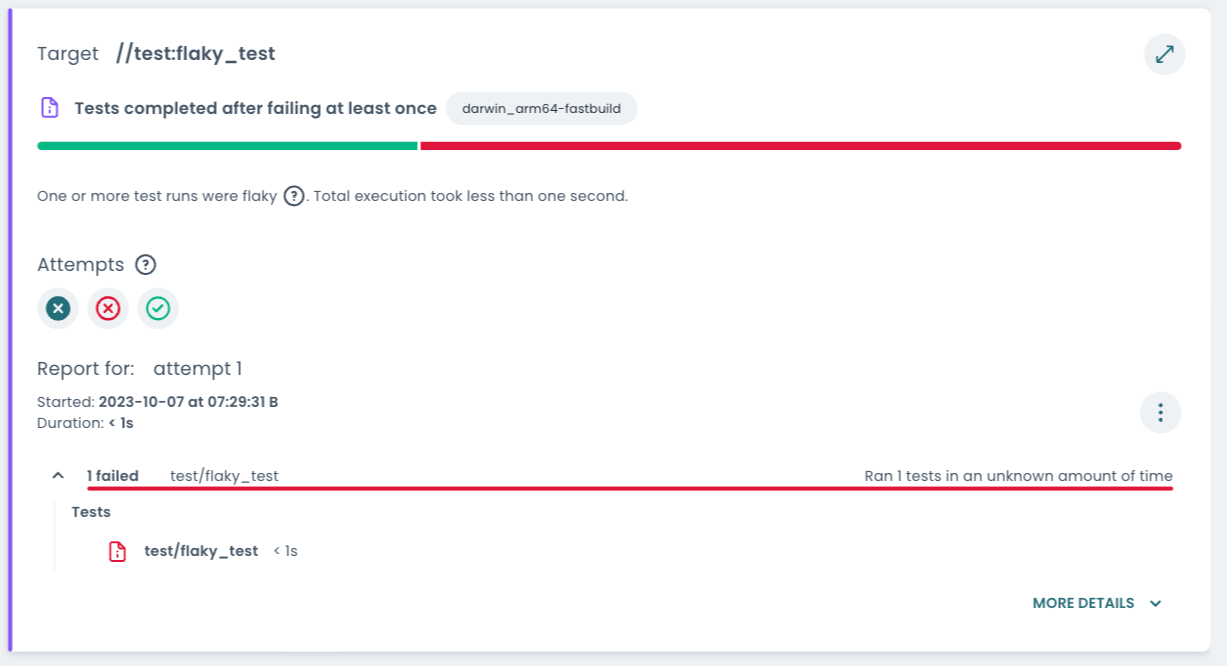
Test attempts
With the rule attribute flaky and the Bazel flag
--flaky_test_attempts
tests may be retried up to a number of times if they initially fail. If a test
requires more than one attempt to pass, its status reflects that it is flaky.
The Build and Test UI uses the color purple for flakiness, as seen in the
screenshot below.
Screenshot with multiple test attempts
Navigating through multiple executions
These three features relating to how and how often tests are run can be combined. This can quickly lead to a large number of executions.
If a target has the attribute shard_count = 3 and the test was invoked with
the flags --runs_per_test=100 and --flaky_test_attempts=5, this can lead to
up to 3*100*5=1500 separate results, each of which has a test.xml file.
The Build and Test UI offers a way to navigate through this quickly overwhelming amount of test data, as can be seen in the screenshot below.
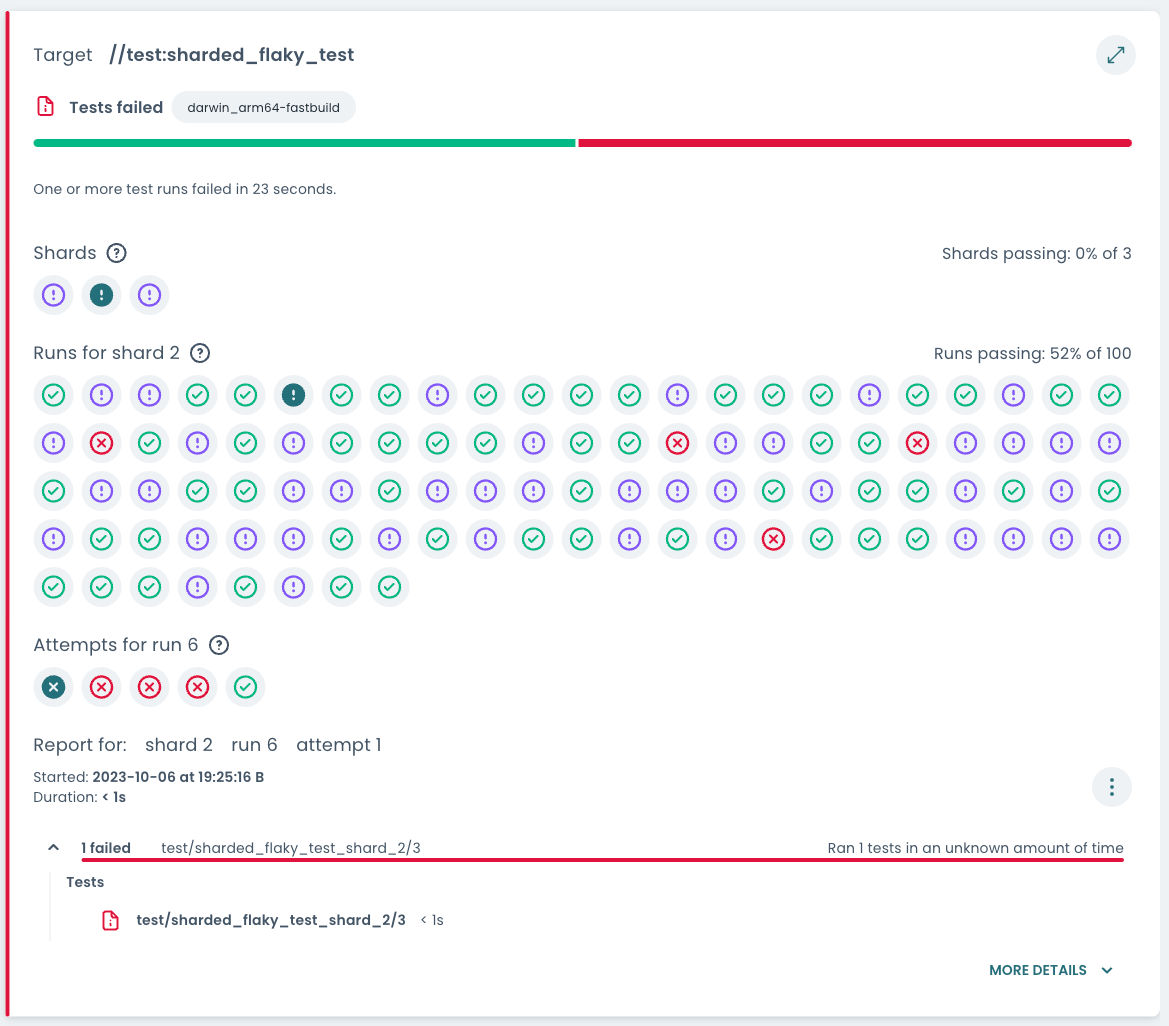
Depending on which features were enabled, three different sections of selectors may be shown.
Shards selector
If sharding is enabled on a test target, its test cases are divided between several shards. To investigate specific tests, pick the shard for which to view test results.
The icon on each button reflects how often the shard passed or failed across all runs:
- green tick: all runs of this shard passed on the first attempt
- red cross: all runs of this shard failed on all attempts
- purple exclamation mark: some attempts failed and some passed, i.e. the test is flaky
A shard always has the same test cases across runs
All of the target’s test cases are split up to the different shards deterministically. If the target is run multiple times, the shards will always contain the same test cases. This helps narrow down the problem space when debugging tests.
Runs selector
If runs per test is enabled, the test target is executed the configured number of times. This section allows you to pick the run for which to view test results. The icon on each button reflects the status of the run:
- green tick: on this run, the selected shard passed on the first attempt
- red cross: on this run, the shard failed on all attempts
- purple exclamation mark: some attempts failed and some passed, i.e. the test is flaky
This information can again be used to narrow down which test reports are most interesting to investigate.
Attempts selector
If there were multiple test attempts, this section lets you pick the attempt you want to view the results of. The icons on the attempt buttons reflect the status that is reported by Bazel for that particular attempt.
Selected result
The test report shows the data of a specific shard, run, and attempt. This
includes visually rendering the contents of the
test.xml.
URL includes which shard, run and attempt was viewed
If you share the link to the Invocation Details page, it includes both which target and which result (selected shard, run and attempt) to open on load. This can be helpful especially when sharing debugging information with others, such as in a bug report.
By default, the first non-passing shard, run, and attempt is selected.